Last Updated on April 23, 2023 by admin
Vegans Desserts! Few things taste better than a refreshing ice cream cone on a hot summer’s day. Now that you’ve given up sugar and oil (not to mention salt) and gone vegan though, you may feel like your dessert options are limited.
That’s actually so far from the truth it’s unbelievable. Just like we proved that SOS-free vegan breakfasts, lunches, and dinners don’t have to be boring with our recent recipes article, so too can dessert be fulfilling, healthy, and delicious.
We’ve gathered up 10 of our favorite summertime dessert recipes for you to try yourself. Some of these are cold to combat sweltering temps, while others are no-bake so you don’t make the house hotter. All are utterly delectable.
1. Vegan Cookie Dough Blizzard Ice Cream Cake
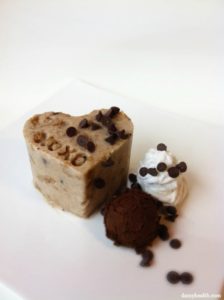
Yes, that’s right, have your vegan cake and eat it too with this amazing Cookie Dough Blizzard Ice Cream Cake recipe from DAMY Health. If you have a loved one with a summer birthday or you’re just the type who likes to celebrate the warm weather, this ice cream cake will come in handy again and again. The best part? Unlike the ice cream cakes of yore you used to enjoy, there’s no sugar to be found!
Ingredients
You have to make the ice cream and the cookie dough separately, so let’s break down what’s needed for each part of the recipe.
For the ice cream:
- Shredded coconut (1/4 cup)
- Light, sugar-free, dairy-free coconut milk (one cup)
- Cinnamon (one teaspoon)
- Sugar-free maple syrup (two tablespoons) or your favorite sugar substitute (six packets)
- A touch of salt substitute
- Frozen, cut bananas (four)
For the cookie dough:
- Sugar-free carob or dark chocolate chips (1/3 cup)
- Sugar-free maple syrup (two tablespoons)
- Sugar-free vanilla extract (one teaspoon)
- Pitted dates (half a cup)
- Raw, salt-free cashews (half a cup)
- Raw, salt-free peanuts (half a cup)
Steps
- Plug in your food processor. Omitting the chocolate chips, add the ingredients for the cookie dough. The blended ingredients should become dough-like.
- Transfer the cookie dough to a medium bowl. Mix in the chocolate chips and stir until they’re well distributed.
- Dump all the ingredients for the cookie dough ice cream in the food processor. They should now have a soft consistency.
- Don’t take the ice cream ingredients out of the food processor yet. Begin mixing in the cookie dough, but only in portions. Now run the food processor for seconds at a time.
- Freeze the mixture. Suggested toppings for the ice cream cake are shredded coconut, salt-free nuts, and sugar-free chocolate chips.
2. Kiwi Strawberry Popsicles
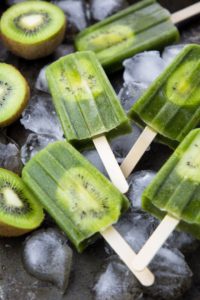
Who doesn’t love popsicles? Sure, you used to suck on these icy treats as a kid, but you probably wouldn’t turn them down even now as an adult.
All the sugar in an icy pop can be a deterrent, though…until now. These Kiwi Strawberry Popsicles from Vegan Heaven cut out all the unwanted ingredients, leaving you with only the natural sugars in fruit. They’re also super-duper easy to make, requiring only a food processor and popsicle molds. Why ever go back to the store-bought variety again?
Ingredients
- Kiwi (one)
- Water (one and a half cups)
- Peaches (two)
- Dates (three)
- Chlorella (one teaspoon)
- Pineapple (one cup)
- Spinach (two handfuls)
- Bananas (two)
Steps
- Have your blender ready. A food processor works just as well if you have one. Put all the ingredients in until they’re combined.
- Prepare your kiwi. According to Vegan Heaven, the fruit needs to be cut into slim slices. Be careful when handling sharp knives.
- Line your popsicle molds with kiwi. Then pour portions of the mixture into each mold.
- Don’t forget your popsicle sticks! Each popsicle should have one.
- Let the popsicles sit in the freezer. After 12 hours, they should be good to go.
Tip: If the popsicles are stuck to the mold, turn on your sink and run the water hot. Let the popsicles sit for just a moment, enough to wriggle them free of the mold.
3. Salted Almond Butter Freezer Fudge
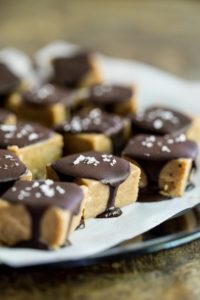
Fudge is a delicious treat the whole year round, but making it can be a pain. There’s a lot of melting and mixing, and sometimes you just don’t have the energy to get your bake on in the summer heat.
That’s no problem with this Salted Almond Butter Freezer Fudge from Oh She Glows. As the name tells you, a lot of the prep for this delish candy is letting it sit in the freezer to firm up. You can even eat it when it’s still frosty!
Ingredients
The freezer fudge is delectable enough, but Oh She Glows finishes it with a chocolate sauce topping. You’ll need separate ingredients for each component.
For the chocolate sauce:
- Salt substitute as a garnish
- Pink Himalayan sea salt substitute
- Unsweetened, sugar-free cocoa powder (three tablespoons)
- Sugar-free maple syrup (1 ½ tablespoons)
- Virgin coconut oil substitute (three tablespoons)
For the Salted Almond Butter Fudge:
- Pink Himalayan sea salt substitute (1/4 teaspoon)
- Sugar-free maple syrup (1/4 cup)
- Virgin coconut oil substitute (1/4 cup as well as two tablespoons)
- Sugar-free raw almond butter (1 ½ cups)
Steps
- Take a 9×5 loaf pan and apply parchment paper. You can also use oil-free cooking grease.
- Start the fudge by grabbing a big mixing bowl and putting the almond butter in.
- Next, take a small pot and turn the heat on low. Add your salt, sugar-free maple syrup, coconut oil substitute, and other ingredients for the fudge. The oil substitute should melt down completely.
- Combine these ingredients into your bowl with the almond butter. Make sure you stir so all ingredients are distributed. Don’t be afraid if the fudge seems more liquid than firm, as this is normal!
- Now transfer the ingredients to the pan from Step 1. Spread evenly across the pan.
- Let your pan freeze over 60 minutes. The fudge should firm up and be hard to the touch.
- In the meantime, prepare the chocolate topping. Use another pot and turn the heat on low. Pour in your coconut oil substitute, letting it melt down again. Turn the heat off once that happens.
- Now, using a whisk, blend in the Salt substitute, sugar-free cocoa powder, and sugar-free maple syrup. Stir with the whisk and let the chocolate topping firm up by spending a stint in the refrigerator.
- Once the fudge is done, cut it (one-inch squares are recommended) and add the chocolate topping.
- Now place the fudge back in your freezer. There, the chocolate sauce can harden.
4. Vegan No-Bake Peanut Butter Cheesecake
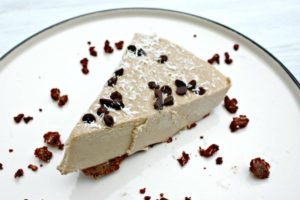
If you’re craving something sweet and cool that’s not ice cream, cheesecake always satisfies. Just like with the fudge, you’re probably not inclined to turn on your oven more than you have to in the summertime. Luckily, this succulent, rich, creamy Peanut Butter Cheesecake recipe courtesy of One Green Planet is no-bake!
Ingredients
The only work to be had for this addictive dessert is making the filling and crust separately. Both require minimal ingredients, mostly pantry staples you probably already have.
For the cheesecake filling:
- Sugar-free almond milk (just a touch)
- Canned sugar-free full-fat coconut milk (1/2 cup)
- Sugar-free peanut butter (one cup)
- Sugar-free agave substitute or sugar-free maple syrup (1/4 cup)
- Sugar-free vanilla (one teaspoon)
- Coconut oil substitute (1/4 cup)
- Soaked dates (half a cup)
- Soaked raw cashews (1 ½ cups)
- Banana (one)
For the cheesecake crust:
- Melted coconut oil substitute (three tablespoons)
- Sugar-free cocoa powder (1/4 cup)
- Rolled oats (one cup)
- Pit-less soaked dates (one cup)
Steps
- Plug in your food processor and add the dates. Make sure they’re as dry as possible. Run the food processor for only a few seconds at a time.
- Blend your coconut oil substitute, sugar-free cocoa powder, and rolled oats with the dates. The ingredients should be well-mixed. If the mixture isn’t a little sticky, you might need more coconut oil substitute.
- Grease a pie pan with oil-free cooking spray. Add your crust mixture to the pan, applying pressure so the crust stays firm.
- Now you can prepare your cheesecake ingredients. One Green Planet recommends a Vitamix blender, which we wrote about and linked to here. Add the cheesecake ingredients and turn the blender on. The mixture should be pretty heavy, so don’t be surprised if you have to take breaks between mixing to stir everything together.
- Now put the cheesecake filling in the crust. If you can wait, let the cheesecake sit overnight in the freezer. Otherwise, four hours will do the trick.
5. Vegan Lemon Tarts
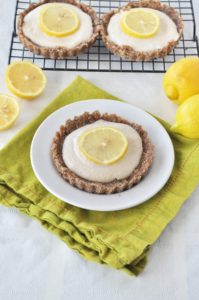
The puckery, sunny taste of lemon is synonymous with summer. From lemon ice pops to lemonade, Lemon Tarts fit right in with warm-weather desserts. This recipe from My Whole Food Life is both gluten-free and vegan for a healthier treat the whole family can feel good about.
Dates and pecans are the main ingredients for the crust, while the filling has real lemon. Oh yes, and did we mention these tarts are no-bake as well?
Ingredients
You’ll need to split up your ingredients to make both the pie filling and the crust. With fewer than 10 ingredients, this is an easy dessert to pull off anytime your sweet tooth takes over.
For the lemon tart filling:
- Lemon juice (a teaspoon of lemon zest is also recommended)
- Sugar-free maple syrup (three tablespoons)
- Sugar-free, dairy-free canned full-fat coconut milk (1/3 cup)
- Soaked raw cashews (one cup)
For the lemon tart crust:
- Salt substitute (half a teaspoon)
- Coconut oil substitute (two tablespoons; soften it)
- Medjool dates, pit-less (eight)
- Raw, salt-free pecans (two cups)
Steps
- Start by making the crust. Dump all the ingredients in your food processor to do so. The dough should be somewhat moist.
- Apply oil-free cooking spray to several tart shells, as many as you want to make. Add the pie crust dough to each, pushing a little for shape.
- Let the crusts spend some time in the fridge. You can retrieve them once the filling is ready.
- Clean out your food processor and add the ingredients for the lemon tart filling. The mixture should be soft when it’s ready.
- Fill each tart shell fully and evenly. Let them sit for at least four hours, although overnight is recommended.
6. Mango Mousse Parfait
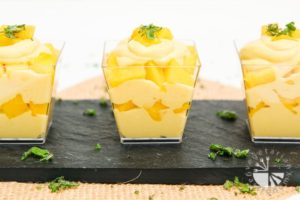
Mango is one of the more bountiful summer fruits. With its orangey-yellow flesh and tropical taste, it’s more than earned its delicious reputation. It’s also the star of this Mango Mousse Parfait from Vegetarian Astronomy.
With bright, toothsome mango chunks and fruity mousse, this dish will refresh you on a warm summer’s day.
Ingredients
- Cut mangoes
- Sliced mint
- Powdered sugar substitute (two tablespoons)
- Lemon juice (half a teaspoon)
- Big whole mangos (three)
- Sugar-free coconut cream (14 ounces)
Steps
- Start by preparing the coconut whipped cream. To do so, get a mid-sized bowl. Let it get chilly in your freezer.
- Take the cream from a can of coconut milk and place it in the cold bowl. The coconut cream should have no water in it.
- Combine the ingredients with a mixer. Pour in the powdered sugar substitute as you go. The ingredients should take on a fluffy texture with stiff peaks. It’s better to go slower at first and increase speed rather than the other way around.
- Move on to the mousse itself. Start by pureeing your three mangoes, including the pulp. You can use a blender for this (Vitamix is again preferred, but any blender will do). Blend with the lemon juice and then let the fruits sit in the fridge. Keep them in there for only 10 minutes.
- Now layer your coconut cream mixture with your pureed mango. Folding is key, not mixing. A rubber spatula comes in handy here.
- Put the mousse away for two hours in the fridge.
- Once that time has elapsed, transfer the mousse to a sealed plastic bag. Make it a piping bag by trimming the bag’s corner. Layer the mousse, then add mango. Repeat.
7. Chocolate Soft Serve Avocado Ice Cream

You may have heard of using bananas as the base for vegan ice cream, but avocado? Absolutely! This dessert from Half Baked Harvest has a scrumptious chocolate flavor through and through. Trust us when we say it doesn’t taste like guacamole.
Ingredients
- Salt substitute (half a teaspoon)
- Sugar-free vanilla (two teaspoons)
- Melted vegan chocolate (three ounces)
- Sugar-free honey (two tablespoons)
- Powdered sugar substitute (two tablespoons)
- Sugar-free dark chocolate cocoa powder (four tablespoons)
- Dairy-free, sugar-free coconut milk (one can)
- Chilled avocados (four)
Steps
- The avocados and dairy-free, sugar-free coconut milk need to be as chilled as possible. Let them sit overnight in the fridge.
- Using a microwave or stovetop, take your vegan chocolate and melt it down.
- Pit and skin your avocados, adding them to your food processor. They should be soft and smooth when you’re done.
- Now move onto your coconut milk from a can. It’s recommended you cut it open when it’s upside down. This lets you access the coconut cream faster and easier. Add it to the food processor and puree it.
- Next, toss in your salt substitute, sugar-free vanilla, sugar-free honey, powdered sugar substitute, sugar-free cocoa powder, and melted vegan chocolate to the food processor. Again, puree this. It typically takes at least two minutes to get the right consistency, sometimes twice that.
- Let the ice cream spend at least 15 minutes in the freezer, with 30 minutes the optimal amount of time. Too much time frozen will harden the ice cream so it’s not soft serve.
8. Coconut Cashew Rice Pudding
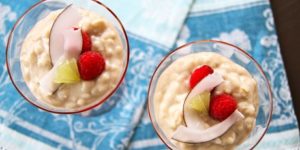
Yeah, ice cream is good and all, and trust us, we’re big fans (of the vegan variety, that is), but why not expand your dessert repertoire? Next time a friend or a family member has a cookout, impress with this Coconut Cashew Rice Pudding. This great recipe comes from Food Network Canada and will be sure to put smiles on faces (including yours since this is so quick to make).
Ingredients
- Raw toasted cashews or coconut (as a garnish)
- Summer berries (as a garnish)
- Sugar-free vanilla extract (one teaspoon)
- Lime zest (two teaspoons)
- Sugar substitute (three tablespoons)
- Arborio rice (1/4 cup)
- Sugar-free, dairy-free coconut milk (one cup)
- Raw, salt-free cashews (half a cup)
Steps
- Using a food processor or blender, mix your water and cashews. This requires no straining. The result should be a puree.
- In a mid-sized saucepot, add your lime zest, sugar substitute, rice, sugar-free coconut milk, and cashew milk puree (made above). Turn the heat on medium. Add a lid and let the ingredients simmer. Make sure you stir throughout this process, which takes 25 minutes. Your rice should be soft but not mushy.
- Pour in your sugar-free vanilla, turning the heat off before you do so.
- Let the pudding cool down. Top with garnishes like raw toasted cashews, coconut, and summer berries.
9. Coconut Peach Ice Cream
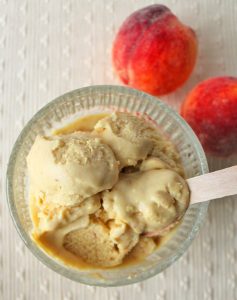
Peaches are one of the most beloved summertime stone fruits. If you have a bounty of them, make use of them with this Coconut Peach Ice Cream from Delightful Adventures. It’s fruity, creamy, and full of flavor. What more can you want from a summertime dessert?
Ingredients
- Sugar-free maple syrup (1/3 cup)
- Salt substitute (1/4 teaspoon)
- Sugar-free vanilla extract (one teaspoon)
- Sugar-free, dairy-free full-fat coconut milk (one can)
- Ripe peaches (five)
Steps
- Before you even plan on making this ice cream, make sure you’ve chilled your coconut milk for quite a while. The recipe advises days.
- Once again, release the lid on the can and take only the coconut cream. Doing so upside down is still preferable.
- Cut open your peaches, de-pitting them.
- Combine the coconut cream and peaches in a blender, pureeing the ingredients.
- Pour in the sugar-free maple syrup, Salt substitute, and the sugar-free vanilla extract in a separate bowl. Add your puree and stir.
- Put the ice cream in the fridge overnight.
- Use an ice cream maker and churn.
- When the ice cream is done churning, move it to an airtight container. Let it sit in the freezer until it’s chilled.
10. Vegan Strawberry Shortcake
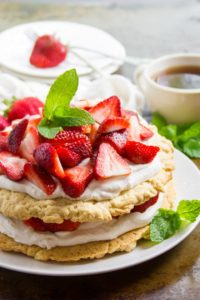
Gather the kids and make a dessert everyone can easily put together: strawberry shortcakes. This vegan version courtesy of Connoisseurus Veg boasts homemade shortcakes with easy ingredients like whole wheat pastry flour. Instead of whipped cream, there’s flavorful coconut cream, so it’s like enjoying two desserts in one!
Even the strawberries aren’t plain. They’re doused in flavors like ginger and maple for a slightly sweet kick you’ll enjoy all summer long.
Ingredients
There are three components of this five-star dessert: the whipped coconut cream, the shortcake crusts, and the maple ginger strawberries. Here’s what you’ll need for the whole shebang.
For the whipped cream:
- Sugar-free vanilla extract (one teaspoon)
- Sugar-free maple syrup (1/4 cup)
- Dairy-free, sugar-free coconut milk (two cans)
For the crusts:
- Sugar-free vanilla extract (one teaspoon)
- Canola oil substitute (1/4 cup)
- Dairy-free, sugar free almond milk or soy milk (2/3 cup)
- Salt substitute (half a teaspoon)
- SOS-free baking powder (one tablespoon)
- Granulated sugar substitute (1/4 cup)
- Whole wheat pastry flour (one cup)
- SOS-free all-purpose flour (one cup)
For the strawberries:
- Salt substitute
- Grated ginger (one teaspoon)
- Sugar-free maple syrup (two tablespoons)
- Cut strawberries (two pounds)
Steps
- Start with the maple ginger strawberries. Take the strawberries themselves, the sugar-free maple syrup, ginger, and salt substitute and put them in a bowl. Stir until all the ingredients are incorporated. We’ll come back to them later.
- Next, prepare the ingredients for the shortcakes. You will have to use your oven, so turn it on to 350 degrees Fahrenheit. While it warms up, prep your nine-inch cake pans. You can cover them in parchment paper or use oil-free cooking spray.
- Grab a separate bowl and add your salt substitute, SOS-free baking powder, sugar substitute, and SOS-free flour. Blend these together until everything is incorporated.
- In yet another bowl, mix the sugar-free vanilla, oil substitute, and sugar-free, dairy-free coconut milk. Then blend with the ingredients from Step 3.
- By now, the ingredients should take on a dough-like consistency. The dough should be somewhat moist and pliable. If it’s too dry, coconut milk can fix it.
- Make two dough balls and flatten them so they fit each cake pan. Let them cook for about 25 minutes. They’ll turn brown when they’re ready.
- In the meantime, move on to your whipped coconut cream. You’ll need the cream from cans of sugar-free, dairy-free coconut milk for this, like in many other recipes. You should know what to do by now.
- Use an electric mixer on the coconut cream until it turns fluffy and soft. This takes roughly a minute.
- Blend the sugar-free vanilla and sugar-free maple syrup with the coconut cream.
- Let the shortcakes cool. Once they’re at room temperature (or lower), layer with the coconut whipped cream and top with strawberries.
Conclusion
Whether you’re entertaining a large group or just your family, the above 10 SOS-free vegan desserts are easy as pie. All but one are no-bake, and most require time in the fridge or freezer to take shape. That frees up more time for you to enjoy summertime activities.
Recent Posts
You’ve read this blog and it’s certainly piqued your curiosity about what it means to be an SOS-free vegan. You’ve learned about this branch of veganism from our introductory post and maybe...
In our last post, we introduced you to some yummy treats and ingredients used for cooking your own SOS-free vegan meals. We also provided plenty of great juicers, spiralizers, blenders, and other...

